Engineering Design, where projects in term 4 included Wind Turbine, Clamp, Boat, and mouse trap. Every term also includes aquaponics.
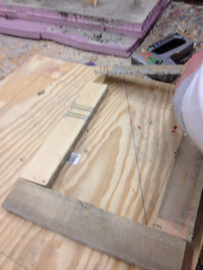
This is the base of our wind turbine. The wind turbine and piping will rest of top of this while it is picking up voltage from the moving fan.
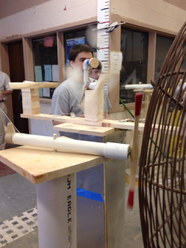
This picture shows our (Alec, Brett, Noah, Justin) wind turbine about to pick up the voltage from the electric fan. As you see the fans wind is moving our red tipped propeller. As it turns the propeller it also turns the white piping.
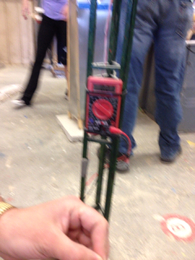
As you see from the picture this is our voltage reading. The project is now over and our reading was .25 voltage.
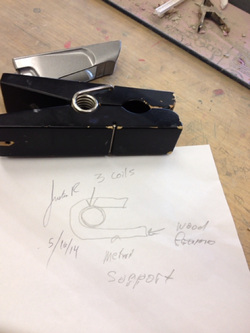
My class has started the clamp project and I have been approved. I will be using wood for my clamp and steel rods to create the power and how strong the clamp can hold things.
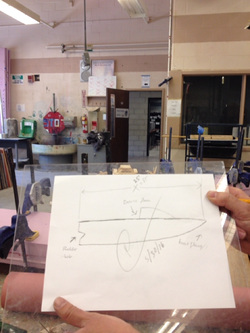
My boat partner Justin, and I have been approved to start creating our boat. We will be making a carved in boat out of pink foam. We both will use tools to create the back of the boat and to make the pointed front of the boat.
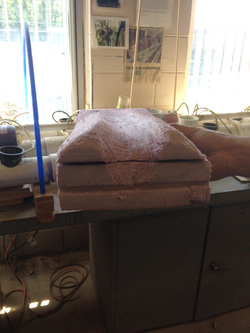
The foam boat is nearly complete. All the features of the boat have been created. It has been carved to the best of our ability and all that is left is to add the red paint.
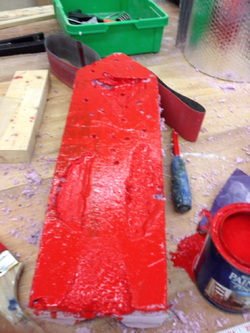
Our boat is now complete. The red paint has been added on. All sides of the foam boat has been painted red. This project is now over and term 4 has been a success with my projects.
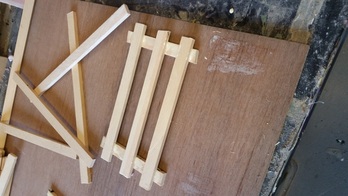
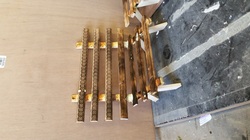
We started our final today and the goal was to create a redesign on a park bench. It started off by ripping wood from the table saw. After that I started to think of a design of the park bench. I measured out all my wood and I started to put the bench together. The pieces of wood were measured then cut by the band saw What is shown in the picture is the seating part of the bench.
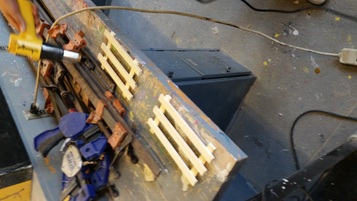
This picture shows my friend and I's seating parts being dried by the heat gun. To create the seating part a total of 5 pieces of wood are glued together.
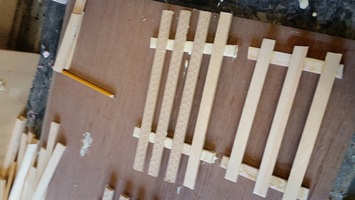
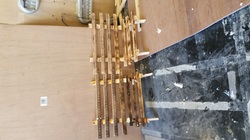
I am about half way done with the redesign of a park bench. The picture shows the seating and back rest of my park bench. A total of 6 pieces of wood are glued together very similar to the seating. 3 pieces on the back have a design to make the bench look fancy and have quality.
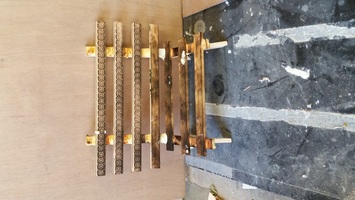
The back rest and seating are now drying while attached. As you see in the picture the legs have just been added on; The legs are used to stand the bench so weight can be added to the seating part.
The legs of the bench are now dry and finish. As you seen I took the heat gun and made a black and brownish tint to the wood to get that bench feel. Most wood benches you see today have a brownish color so I wanted that kind a feel added to my redesigned park bench.
The 2014 final project of the redesigned park bench is now completed. After two hours my bench look like a real park bench. A total of 15 pieces of wood were put together to create this. I have been successful in making this park bench and I have met my goal. In the 2013-2014 school year Mr. Ramos gave us all sorts of projects to do. I met success and I have met failure followed by success. It was a pleasure being in Mr. Ramos's engineering design class and we'll always remember the 3 things he taught us; We want and need quality and it is always engineering time.
